
 Well I guess now it's Tutorial Tuesday, EH?
Well finally Blogger got ahold of itself and is allowing pictures at the convenient time window of 5 AM. So I better hop in!
Okay - so remember this card? Well here's what you do to shade like a marketing chick... :)
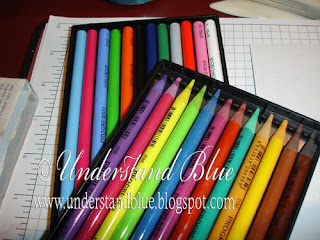
First, choose two complementary or similar colors - your choice. I am using the Koh-I-Noor pure color pencils. Prismacolors are very nice too. What you want is simply a pencil with a very smooth texture. You don't want the pencil to get
 "caught" in the texture of the paper and distribute color unevenly. The paper I'm using is Stampin' Up! Naturals White. It has enough texture to grab the color but not enough to be bumpy or uneven.
I both start and end with the lighter color. I have no idea if that's kosher in the coloring world, it's just what I do. So in this case I took the lighter spring green at the right side of the vase. I put down a very solid, intense line of color at the right edge.
When that is done, extend the lighter color all the way to the opposite side of the vase in a gradient, with barely any color at all on the left hand side.

I mean barely - just the very lightest of touches at the end. This lighter section will be the foundation for your second color. Trust me that when the colors play together they look much better than if you don't put that foundation down - or better yet, just try putting your second color down on the blank paper and see if it doesn't fall a little flat.
With the second color, use the same technique - dark at the edge, and gradually work over into the first color, ending with a feather light layer blending into the lighter color.
To
 finish blending, most of the time I use the lighter color as a blender - going back over the area where the gradients cross each other, and adding a little more color where there is any unevenness. Sometimes I leave a white area to give even more appearance of light than the lighter color does.
Feel free to go back with both colors and shade lightly where they meet - every layer of color you add adds depth. On this vase, I also went back in with a turquoise blue on the dark green side. You can't so much see the blue as you can see that it deepens the shadow and just adds a little something special, as blue often does! :)
Just make sure that you leave an area where the
 color is not solid on the paper. This is what adds light to your image.
And don't get frustrated if it doesn't look right the first time. This takes practice. I like to stamp a whole row of the same image as I've done here, and experiment with both my technique and my colors.
Complementary colors are really fun, as are colors with more variation that aren't complementary - like orange or red paired with yellow - pink with yellow is really pretty.
But be patient with yourself and try lots of different combination.


 Hopefully tonight -one more crayon rubbing card.
At the Memento Mall at Convention, Stampin' Up! sold the magnesium plates that they used to manufacture some selected retired sets. I was really hoping to find Wonderful Wings, but I did not.
I did find Architectural Elements which is one of my all time favorite sets. I forgot to take a picture of the plate itself, which is BEEEEAAUUUTTTIIIIFFFUUULLLL. Shiny silver plate with the set repeated several times. Amazing.
So I took my printer paper, and a black crayon, - oh wait - that's for tonight. :)
Have a great Tuesday! Don't forget - my show is on today at 1 PM on Channel 11!
Oh, and Martha - you don't have to thank me - really - my pleasure!! ;)

Thanks for the pencil tips ... I really love your blended colors.
ReplyDeleteYour color choices are so cool!
ReplyDelete