It was the BEST teaching experience ever, thanks to the next-level organizational skills her employees have.
I literally just had to show up, and everything was there in my classroom for me for each of my four classes - color instructions with photos, class kits, supplies, all neatly organized and ready to go.
The facility was amazing, with overhead projectors, beautiful tables in classrooms with windows, and she provided awesome meals and activities, and of course, giveaways.
She's such a sweet lady, and it certainly showed throughout every aspect of the event.
My students were so much fun, and my two helpers, Lisa and Deane were amazing!
Then I came home and went to Ohio. Then I came home from Ohio and went to my retreat, which ended yesterday! My guests are still here for shenanigans, but I'm looking forward to No-Travel-Vember. I was only home six days this month! EEK.
I wanted to share with you the projects that I taught at Stamp Joy with Taylor's liquid watercolors.
When she asked me what products I wanted to teach with, I knew immediately what I wanted to use - her scenic dies. I wanted to teach a watercolor texture class, and her dies are perfect for that.
The first card was an exercise in using multiple pigments to add interest.
For the sky, we used Blue Corn & Cookie Monster watercolors, dropped onto a craft mat and misted. Then we smooshed the watercolor paper into them until it was covered. While it was wet, we pressed a paper towel wadded up into a ball into the sky to create clouds.
For the grass pieces cut with these dies, we used Spearmint, Peapod and Toffee watercolors, dropped and misted again and picked up with the die cuts. The sentiment is from this set.
I call the wadded up paper towel my "cloud machine" which I learned in Gay Kraeger's class last year.
For the next card, I also used her scenic dies - these stitched clouds and these mountains. This time, we misted the watercolor paper, and dropped Blue Corn and Plum punch onto the mat and did NOT mist the watercolor. We quickly dipped the mountains into the watercolor and added plain rice to them and let them air dry. The more pigment you have compared to water, the more texture you'll get. The sentiment is from this set.
For the third card, we made a tilty rainbow, by first spraying both sides of the watercolor paper. We dropped the watercolor this time directly onto the wet paper, tilting it to mix and blend the colors. You can tap the edge on your craft mat if a puddle forms at the edges. Tilt slowly so that the colors stay somewhat distinct. The colors we used are Guava, Lemon Meringue, Lime Zest, Cookie Monster and Plum Punch. We dried that with a heat gun, and then sprayed the whole thing with her Shimmer watercolor, mixed with alcohol in a mister. Taylor's watercolors are a glazing medium, meaning that you can layer more color on top of dry color and it won't disturb the lower layers. That's why topping it with shimmer will not mess up your rainbow! The sentiment is from this set.
For the last card, we made a beach scene with a "wave machine" a la Gay Kraeger. We misted both sides of the watercolor paper and then dipped them into Cookie Monster watercolor on a diagonal, and Lemon Meringue and Chocolate Truffle on a diagonal on the bottom until the two sections met. Working quickly, with a tightly rolled paper towel snake, blot the blue section to make surf.
In class we added the "hello summer" sentiment from this set onto the sand. Little did I know when I designed these projects that it would be four million degrees below zero during the event. OOPS. :)
Now before I left, I discovered that my phone was on its last legs and was no longer saving my video tutorials (you might notice I haven't had many videos lately). It's a very old phone, and I've probably gotten my money's worth out of it at this point, so I got a new one right before I left, but didn't have time to activate it, so I left it home.
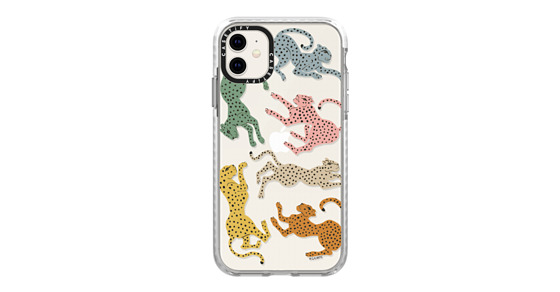
But one of my favorite podcasts - Southern Fried True Crime - had just done a promo for these adorable phone cases, so I used her promo code and gave them a try. LOOK HOW CUTE THESE ARE. Here's the one I got.
They also allow you to do a custom case, which I will be doing very soon! Here's what they look like - you connect your Instagram account and choose a photo or a photo collage! Easy as pie.
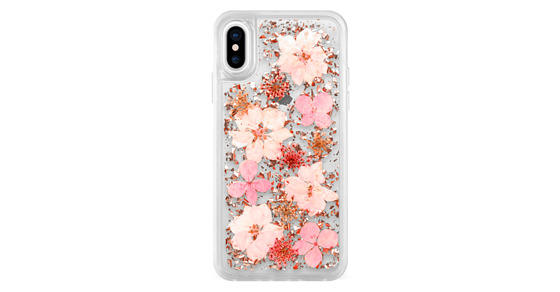
I like the pressed flower case too. This was a hard decision.
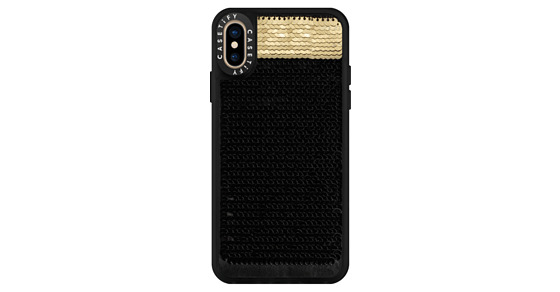
You can EVEN DO A HIDDEN MESSAGE SEQUIN CASE! You know, where you rub the sequins one direction to reveal a word? SO FUN. Multiple colors available.
Life is too short for boring phone cases!
You also can add a glass screen cover with any case, which is a must for me and my naughty cats.
You also can add a glass screen cover with any case, which is a must for me and my naughty cats.

|
So happy to be home for a month or two. Hope you have a great week!
Loveyameanitbye.









I love Taylor, and her products! I own many of her liquid watercolors, which I purchased after taking her class at Junkie Fest '18, so I will have to get them out and try these techniques. Love your tilty rainbow! (I may have to arrange for a private lesson) Lol
ReplyDeleteLove them all but especially the beach scene. I don’t want to go to work - I just want to try making all four projects!
ReplyDeleteLove your blog post! yes TE Stamp Joy is amazing! It was wonderful to work with you during Stamp Joy! enjoy your non travel November!
ReplyDeleteWow! What fun techniques! Fantastic cards!
ReplyDelete