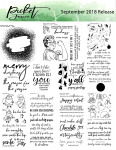
So I have four cards today, starting with the most lazy and quick coloring method all the way up to real coloring where you take a little more time and add details.
So do you remember this video? This is one of my favorite lazy coloring methods. I tweaked it just a bit for the first card today.
If you have a very detailed image that you don't want to take the time to do detailed coloring on, this is a quick way to make it look arty. You need a MISTI to make this work well.
- Stamp the image on watercolor paper with Blueprint Sketch Distress ink, or your favorite water reactive ink.
- Spray the image with water until the ink moves to your liking
- Dry the paper and overstamp with Nocturne, or the same ink as I did in the video linked above.
I used this beautiful new stamp set, with a sentiment from the same set.
Now let's say you have just a few more minutes - you can do what I call "cartoon style" Copic coloring - no blending, no layering, just bold color in select areas. Combine that with stamp images in colored ink and you still have a lot of color for very little effort. I stamped the bear from this stamp set in Amalgam ink. I used two markers here - R29 and B02 to color the bear from this set, and I used Wild Dandelion ink to stamp this image. I stamped the sentiment from this set in Nocturne. The bear set does come with matching dies.
Then, for slightly less lazy coloring, you can combine regular, preschool-style coloring - no blending, just stay in the lines, with the cartoon style coloring, where you just add slight accents of another color. I stamped this image in Amalgam Ink, and then colored it and cut it with the matching dies. The paper is from this awesome black & white collection. The sentiment is from this set.
Now let's say you've just had your Wheaties and you are ready to take on a little more involved coloring. I had a lot of fun practicing skin tones with this incredible tutorial. You start on the skin with what seem like crazy colors, and then you tone them down a bit - it ends up so rick and realistic. I colored this STUNNING new image exactly as the step by step explained and I really had fun. I added some white gel pen highlights, and then cut her out with the matching die. I put that on this striped paper and onto a Desert Storm card base. The sentiment is stamped in Nocturne and is from this set.
The best way to get comfortable with any coloring - simple or complicated - is just to COLOR. But you can make pretty cards in two minutes or two hours, depending on what you have time and energy for.
There's another set in the Picket Fence release today that I didn't have time to play with yet, but it's adorable. DONUT miss it :)
|
Hope your weekend has some fun built in.
Loveyameanitbye.


I'm a lazy colorer and was looking forward to seeing the referenced video. FYI: the "this video" hyperlink goes to a YT video metadata editor URL and is unable to load. Loving all the cards!
ReplyDeleteLucy! Thank you SO much for telling me that! I have fixed the link - please try again. <3
Delete