I'm NOT a bullet journaler - my life is a little too chaotic for that kind of thing, but I do love all things gridded, and my planner - the Hobonichi Techo planner, has gridded pages, and that was a huge factor in my decision to buy it. 2019 will be my second year of this planner. It has Tomoe River paper which you can actually even do light watercolor on, and it won't bleed through, even though the pages are so thin they are transparent. On the left page below - you can see the grid of the page behind it - that's how thin it is, but surprisingly strong. I like the A5 Japanese version but there is a smaller A6 version in English if you like that. My lists are too long for that size. The A5 size only comes in Japanese, but to me, that's part of its charm. I use this daily, and it's very reasonably priced for an all year planner with this quality of paper.
My goal every year is always to do a little daily art in my planner or in a journal. I've never made it a whole year, but at least with today's video I have a headstart on one day.
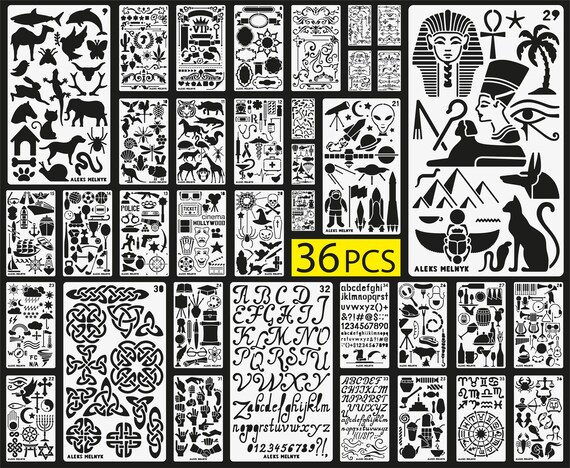
Because the gridded format makes everything so tidy, I also like tidy art from time to time, and for me that means stenciling and pen and ink. So today I'm going to show you a fun trick on how to use multi-image stencils like the set I'm using in the video. Below I've listed them on Amazon and Etsy, but it's slightly cheaper on Etsy - you get THIRTY SIX stencils in this set so it's insanely well priced. I love the big variety of images in this bundle - especially the alien :) and the bee and honeycomb I've used below. The ink I'm using here is Wild Dandelion and Honey Mustard.
At first, I wondered how to use multiple image stencils neatly and then I remembered all those tiny brushes in my Life Changing Blender Brush set and BOOM - I have a billion small stencil images I can use on cards or in my planner.
I finally figured out storage that works for me for stencils. I like systems that let me store EVERY size of something - stamps, stencils, dies - in a similar way. So for stamps, I use two sizes of pockets - this size, which is a thin sleeve with no flap, and these large stamp pockets with a flap. These pockets are the ones I use for dies. I use these pockets for all stencils except 8x10 and larger, and for those larger ones, I use these. ALL pocket products - actually all supplies of every kind go into these small clear bins (you can fit exactly five of these on each shelf of an Billy bookcase from IKEA), and these large bins. I'm almost ready to do a video of my craft annex reorg, so stay tuned for that.
So I made a little video showing you how to use them, and all the supplies are listed below the video.
But before I go on to the video - I've been having a lot of fun embellishing envelopes with my new little donut stamper - you just press it down and it adds a little donut sticker to your envelope - it's freaking adorable.
So here you go! Here's the video.

|
Hope your week started well.
Loveyameanitbye.


No comments:
Post a Comment
Every time you leave a comment, a new LOLcat is born. ALSO - don't panic if you don't see your comment right away - I moderate my comments to keep those spammers out, so your comment will show up in short order. Unless you're linking me to Russian brides or Nigerian princes.