People ask me in comments on my blog how I come up with card ideas, and I thought I'd talk about the progression of a stamper, and where ideas come from. In the beginning, I think we all copied other people's cards we saw on Splitcoast and blogs. Recreating something you see gives you the practice and comfort you need to branch off into creating your own unique designs. That's level 1. Then when you are confident in your skills as a re-creator, you become a creator. But that starts a new process of development of skill. Usually you start by using techniques you've seen, but using different images or a different design. This is level 2. After you've done that for a while, you enter level 3 - where you have lost the fear of trying things altogether, and you use what you have to create your own new techniques, and new designs. It's during level 3, that designers typically find their style, which can be an elusive beast in level 1 and 2, because the designer is still relying on other people to guide what they are creating.
I don't remember the day or even the year that I entered level 3 - but I remember hearing that *click* in my mind. It was a great feeling for someone who had been searching for her style for a while. For example - I LOVED vintage cards in the Splitcoast gallery - Beate, Bekka Feeken, Michele Kovack. But when I tried to make those cards, it was like I was a Sasquatch attempting to do neurosurgery - it didn't work at all. That was like a bumper I bounced off back into the lane I was supposed be in. But I fought it for a while.
I think at the end of the day - you just need the discernment to know the difference between what it feels like to fight something that isn't your style or what you love, and what it feels like to work through and practice things you do love and fit with, but that you need to gain skill in. For me, that was watercolor and CAS (clean & simple) cards. Once I realized that I was at home in both of those things, I started practicing. When I turned a corner on both, I knew I had found my thing. And that's very liberating.
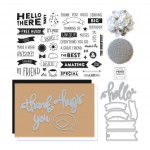
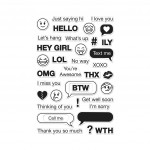
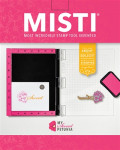
So speaking of CAS cards, I have some fun ones for you today with the new kit from Hero Arts - it's an all-year kit, because it's a sentiment builder set, which makes me so happy. The images are distressed, and sort of grunge and modern. (The first one I even have a video for below, with a quick tip on adding drop shadows with the MISTI.) Because of the way my mind works, I do shadows that are lighter, not darker. :) But if you want a darker shadow, just offset your card as shown in the video, stamp in the darker color, then put the cardstock back in the corner, stamp with Versamark, and emboss with a lighter color. These builder greetings were perfect for an enthusiastic birthday card, and I paired it with the bear and balloon from Birthday Animal Silhouettes.
Here's the video for a visual on my alignment for the shadow.
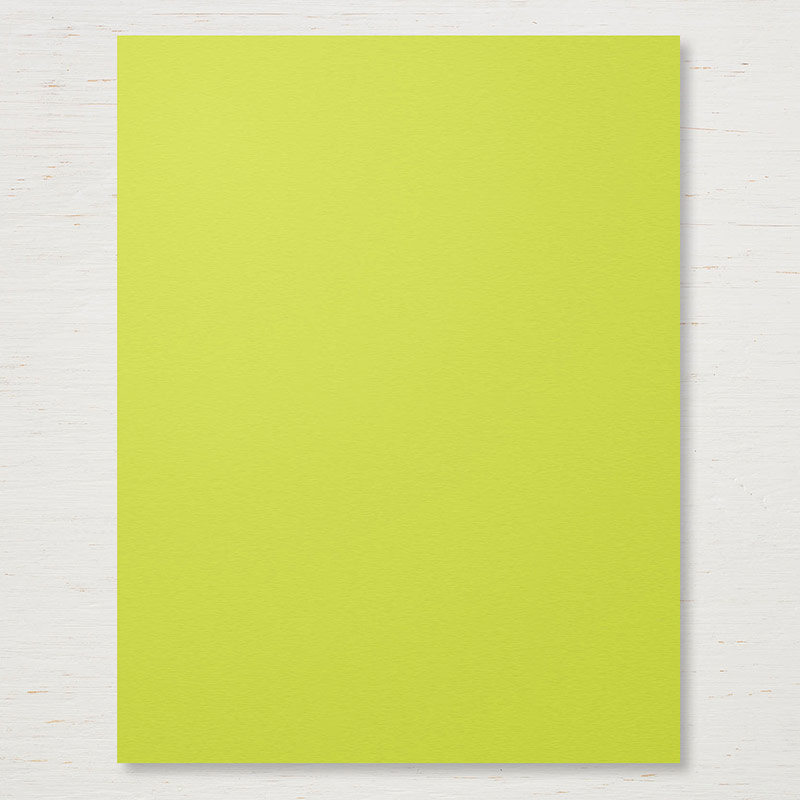
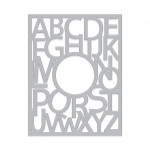
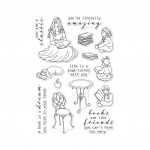
While I was in a green and black mood, I took one of the add-on products - the Alphabet Window Fancy Die, and cut and die-cut inlaid it with green and black cardstock. The inlay is really easy with this die, because the shapes are so unique. When I die cut it, I lift off the top plate, cover the whole thing with Press n Seal, and then flip the bottom plate over and lift off the die. That way everything stays in place on the Press n Seal while I piece it back in. The circle in the middle is perfect for images like the one I used from In the Study. Colored with Copics: YG23, YG000, YG21.
I have an endless amount of patience for die cut inlay, zentangle, and other relaxing, repetitive tasks, but if you don't - I completely understand. So I thought I'd show you another way to make this fun Alphabet die pop, with a lot less work. I just took some of the leftover pieces from the previous card to pop three areas of the background. Reminds me of a Mondrian type design.
I added the little emoji and sentiment from the Text Me add-on. That set cracks me up. I just fussy cut the emoji and colored him with RV29 and YG23.
Are you in love with it as much as I am? I hope so, because I'm going to not leave you alone until I show you just one more with this die. I cut the die with white cardstock, and glued it to a white card base. Then I sponged Distress Oxide inks on it, and splattered it with water. I used the Bookcase stamp - I stamped it on white cardstock and fussy cut it, darkening the edges with my Gasenfude Pen, and adding the sentiment from Story Time underneath it. The Gasenfude has a nylon brush tip, and won't bleed black ink into your image, like your markers can.
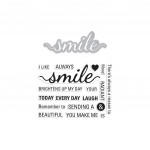
I ran out of time to use the other add-ons, but my last card uses one of my favorite techniques - curving the sentiments around a shape using the MISTI. I had the circle die from my previous card on my desk, so I cut another circle, and sponged Oxides on it. Then I stamped the hearts with Oxides as well. I temporarily adhered the die cut to the lid of my MISTI to arrange the sentiments from the Smile Bundle, then removed them and stamp them around the circle. I made all the sentiments go the same direction except for "every day" - because I wanted that to stand out. You SHOULD smile every day! This add-on is a stamp & cut bundle - so you'll get the set plus the die - which I used to cut some green glimmer paper for the center. The ends of the die cut are longer - I trimmed them to keep them from overlapping my curved sentiments.
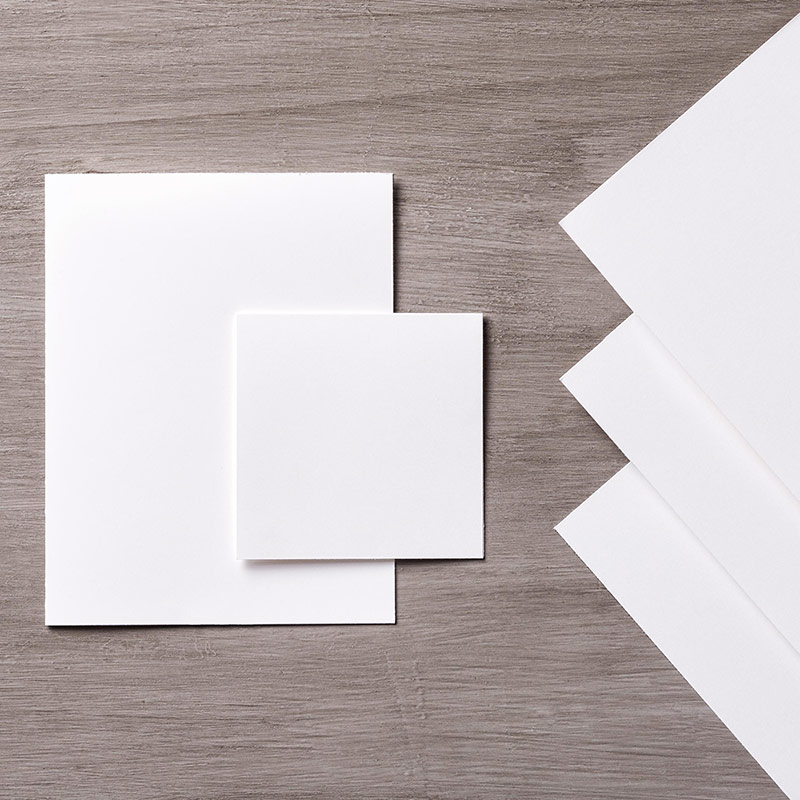
4 8.5" x 5.5" Sheets Basic White Cardstock (80 lb cover)
4 8.5" x 5.5" Sheets Basic Black Cardstock (80 lb cover)
Sparkly Sequins 1.5 oz
Silver Sparkle Embossing Powder 0.5 oz
Unicorn White Ink Cube
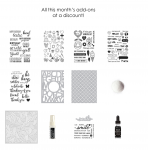
Kit Value: The value of the kit is $70, but it is sold at $34.99. You can also subscribe - so if you want the kit and are not a subscriber, order it today - because when it sells out, it will not be restocked. You can also get all of this month's add-ons for 10% off when you purchase the bundle.
Hero Arts is giving away one kit as a prize to one blog reader - selected from the comments across all of the blogs in the hop. (They will reimburse you if they have already bought the kit.) Giveaway closes Sunday, March 1th at 11:59pm, and the winner will be announced the following week on their blog.
So get to commenting :). The next stop on the hop is my sweet and dear talented friend Jessica.
I remember one time at a retreat. You asked what our superpowers were. I hesitated and you jumped in and said my superpower was mixed media. I grew up that day. I'm thankful for the bumpers on our creative road, too. I don't ever want anyone to get bounced so hard that they leave the road for good. Beautiful projects! I've got to go play now...
This is a fantastic release from Hero Arts. I love cover plate dies and die cut inlay. Your cards are fantastic, the Drunken Acrylic Reveal is so cool!
So many awesome cards! The one that blew me away was the one with the Alphabet die and the In the Study stamps. The black and green contrast looks amazing! Great job!
Just love all those cards. And I can see some great uses for the background alphabet die. So versatile. But I just love your smile card. It is so happy.
Amazing cards - and a wonderful array. Thanks for sharing your inspiration with all of us. I have not found my level 3 yet, but will continue looking !
Ooo, fabulous cards!! This is an awesome kit and add-ons and you showed them off beautifully! Some great techniques too. Thanks for sharing your creativity with us with us!
Such a wonderful introduction in this post. Your cards always have a fun unique flair. This is a great kit for beginners as it contains so many basics.
Every time you leave a comment, a new LOLcat is born. ALSO - don't panic if you don't see your comment right away - I moderate my comments to keep those spammers out, so your comment will show up in short order. Unless you're linking me to Russian brides or Nigerian princes.


The smile card is my favorite. Thank you for sharing.
ReplyDeleteLovely work =- nice use of the new Hero Arts - TFS
ReplyDeleteI remember one time at a retreat. You asked what our superpowers were. I hesitated and you jumped in and said my superpower was mixed media. I grew up that day. I'm thankful for the bumpers on our creative road, too. I don't ever want anyone to get bounced so hard that they leave the road for good. Beautiful projects! I've got to go play now...
ReplyDeleteVery lovely cards.
ReplyDeleteLOVE this kit and your cards are so nice!! thanks for the inspiration.
ReplyDeleteYour cards are beautiful ! I specially love the smile card. Thank you for all the tips and the inspiration.
ReplyDeleteYour cards are lovely! TFS - this kit is truly a must have.
ReplyDeleteBeautiful cards! :) I love the colors.
ReplyDeleteThis is a fantastic release from Hero Arts. I love cover plate dies and die cut inlay. Your cards are fantastic, the Drunken Acrylic Reveal is so cool!
ReplyDeleteThanks for sharing so many great, doable techniques!
ReplyDeleteGreat cards! I especially love the colorful background with the hello die.
ReplyDeleteGreat variety of cards you created from this kit in your wonderful style.
ReplyDeleteA super stunning post, full of inspiration!
ReplyDeleteAmazing cards, thank you for sharing your video also. Love how everyone is using this amazing kit. Thanks for a chance to win.
ReplyDeleteI love all the book-themed cards! And, appreciate your words of inspiration.
ReplyDeleteSuch a versatile kit. I love the book theme. NICE
ReplyDeleteOhhhh for FUN! Great designs. Thanks for the chance to win!
ReplyDeleteLove all the alphabet cards. Thanks for your creativity.
ReplyDeleteReally great ideas. I LOVE the lamp/book card. Colors are perfect, design is perfect!
ReplyDeleteFabulous cards! My favorite is the last one, the glittery die gets me every time.
ReplyDeleteWOW... Lydia... they all are AMAZING and FANTASTIC cards!
ReplyDeleteEach design is super cool. Thank you so much for the inspirations!!!
Wow! They’re all awesome!
ReplyDeleteThese are awesome cards! I can't wait to try some of your ideas.
ReplyDeleteGreat cards and ideas. Also thank you for the story telling. Very intersting to tjink about.
ReplyDeleteThat is a rockin' kit ... and some rockin' cards from you ... love them.
ReplyDeleteyour cards are so pretty and creative. create when you have great products.
ReplyDeleteVery fun and unique cards. Love them!
ReplyDeleteFantastic cards and great representation of this kit and add on items. Love the alphabet background.
ReplyDeleteGreat Cards! Thanks for sharing so many wonderful ideas for the new kit!
ReplyDeleteBeautiful cards! The one with the book shelf is my favorite.
ReplyDeleteI love your explanation of the progression of a stamper. I am at level 2 and hope that I am able to move on to level 3! Thanks for your inspiration!
ReplyDeleteStunning cards thank you for sharing
ReplyDeleteWhat an amazing array of superb projects!! Love them all!
ReplyDeleteJust stunning creations! I love the colors and details. Just amazing!
ReplyDeleteGorgeous! Thanks for the videos showing ideas for your beautiful cards!!
ReplyDeleteSo many creative cards!!
ReplyDeleteThe "so many books so little time" card is fabulous - it describes my daughter so well!!!
ReplyDeleteAwesome cards! Love those alpha window backgrounds!
ReplyDeletegreat cards. I'm going to try the drunken acrylic reveal technique.
ReplyDeleteThanks for sharing so many pretty cards!
ReplyDeleteOh my goodness! So many great cards from this kit and although they all have your style, they are all still very unique. Thanks for sharing!
ReplyDeleteAmazing cards!!
ReplyDeleteWow!!! Beautiful cards!!! I love so much your gorgeous and cool colouring!!!
ReplyDeleteAmazing!! You are so creative. Thanks for sharing so many ideas for using this kit along with other Hero Arts products :-)
ReplyDeleteSuch wonderful cards! Love the many backgrounds!
ReplyDeleteFabulous set of cards again, Lydia! I love the ones with the circles.
ReplyDeleteGreat cards and backgrounds used for them. I love the large letter background die, especially when it is paired with a book & lamp image.
ReplyDeleteI am in love with your sunset colored smile card and the book shelf card so beautiful .
ReplyDeleteSo many awesome cards! The one that blew me away was the one with the Alphabet die and the In the Study stamps. The black and green contrast looks amazing! Great job!
ReplyDeleteGreat examples using this fun kit! Can't wait to use these supplies.
ReplyDeleteI need to stay away from blog hops! I thought I didn't want this, but now I do!
ReplyDeleteWonderful cards using the new kit!
ReplyDeleteThese all look wonderful! Thanks for the videos. I'm going to have to try those techniques.
ReplyDeleteReally fabulous cards!
ReplyDeleteI really love how you used the various bookcase pieces in combination with this kit. Those are my favorite.
ReplyDeleteJust love all those cards. And I can see some great uses for the background alphabet die. So versatile. But I just love your smile card. It is so happy.
ReplyDeleteWhat a nice array of cards. All of them are gorgeous. Thanks for sharing...
ReplyDeleteLove the deep color back grounds. Beautiful cards.
ReplyDeleteLove all your cards - they're all so different and creative! Thank you for the inspiration!
ReplyDeleteEvery single card is amazing and inspiring. I love this months kit too but your art took it to another level!
ReplyDeleteI love it when a die can be used in so many ways. thanks.
ReplyDeleteWow, so many beautiful cards, I love the circular sentiments - thanks so much for sharing and the awesome video.
ReplyDeleteAmazing cards!
ReplyDeleteI am still trying to get out of level 2.. ha ha. I like to think I am a level 3 though... I love your ideas.. Thanks for sharing!
ReplyDeleteLove these, so many different techniques and styles. My favorite is that alpha cover with the text me add on. I love those bright pops of neon!
ReplyDeleteThanks for the great variety of ideas and techniques! I am adding the Smile bundle to my wish list now - love what you did with that!
ReplyDeleteThe alphabet background die is fabulous - and I love how you used it in two completely different ways!
ReplyDeleteI would never had thought to use black and. Green. Great card. Thank you
ReplyDeleteI would never had thought to use black and. Green. Great card. Thank you
ReplyDeleteThank you so much for your video! Love learning new things. You have a new follower.
ReplyDeleteTFS!!
XO April
Cute ideas!! Love these.
ReplyDeleteLove the black and green combination! All of your cards are beautiful.
ReplyDeleteGreat card creations! Love the variety.
ReplyDeleteAmazing cards - and a wonderful array. Thanks for sharing your inspiration with all of us. I have not found my level 3 yet, but will continue looking !
ReplyDeleteOoo, fabulous cards!! This is an awesome kit and add-ons and you showed them off beautifully! Some great techniques too. Thanks for sharing your creativity with us with us!
ReplyDeleteSo many beautiful cards! Love each and every single one of them!!
ReplyDeleteBeautiful cards - love them :)
ReplyDeleteAbsolutely Love the Smile card!! What a great idea.
ReplyDeleteYour cards are amazing! I especially love the blue-sy background with the bookshelf - it's gorgeous.
ReplyDeleteSuch creative cards! Nice bold color combos!
ReplyDeletefabulous cards, my fave is that lovely bookshelf card with the gorgeous blue background.
ReplyDeleteSuch fun and great cards!!
ReplyDeleteAwesome blog post ! Awesome cards !! Thanks for everything !
ReplyDelete[margessw(at)icloud(dot)com]
Such a wonderful introduction in this post. Your cards always have a fun unique flair. This is a great kit for beginners as it contains so many basics.
ReplyDelete