Recently I had the opportunity to attend a
Stamp-n-Storage pop-up event in New Braunfels. I don't know why Brett chose Texas for this fun experiment, but I'm so glad he did. They hit three cities - Houston, Dallas, and the nearly mixed metros of Austin & San Antonio.
They had a trailer with tons of inventory on it that he drove down from Minnesota - narrowly escaping a snowstorm, and they partnered with local scrapbooking stores for the events.
I had a very singular purpose on the day of the event - get
the drawer cabinet (at a nice discount!) and
the accessory trays to create the mother of all mini ink cube storage.
But I'm not wired to do anything the easy way, so in my little brain while I was driving to the event, I thought - I can experiment with the
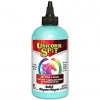
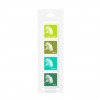
Unicorn SPiT I bought after I saw it at CHA (no, I still don't want to call it Creativation) on my box! And a plan was born in the car on the way to the event.
Now mind you, I've painted furniture - you remember my refinish of the card catalog with chalk paint and wax - and it's a process I REALLY enjoy. In my mind, that card catalog is forever linked with the Serial podcast, because I started listening to it when I started working on that piece.
I love the process of sanding and starting over, and then building up layers until a piece of wood is finished, and - importantly - turquoise.
But I have never stained a piece of furniture (mostly because I won't work with smelly, toxic products if I can help it, but also because I am not a big fan of brown), and of course Unicorn SPiT is neither a paint nor a traditional stain, so this was uncharted territory.
I assumed the risk that I'd ruin the drawer cabinet, and I was okay with that.
So first I watched a bunch of videos about this unique stain - but all of them were somewhat vague about finishes, so I just made some decisions and went with them.
First of all, it's a non-toxic product, made in the USA, and it has no odor other than a faint jasmine scent they add, which is really nice. Since I had to work in a closed garage, this was important.
I lightly sanded the unit, and then applied the
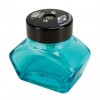
Zia Teal Unicorn SPiT with a brush. It's described as a gel stain and glaze. It beautifully highlights the wood grain and lets any patterns show through the stain, which was REALLY fun in comparison to my ultra-smooth chalk paint on the card catalog.
I applied three coats of stain I think, just to intensify the blue, sanding in between of course. The real fun of this product is mixing multiple colors on wood, but I felt like for my first attempt, I needed to stick with one.
When I had it the way I wanted it, the next step was to seal with an oil-based sealer. I chose
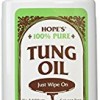
100% tung oil, again because it's more natural, but also because I'd never done an oil seal and I was curious. It was crazy! The wood absorbed the oil each night when I was done, and I could tell when it needed more. I ended up with three coats.
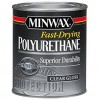
Here's where it got tricky. People on the internet don't always use their words. I read as much as I could about tung oil curing time and everyone said a day or similar. NUH UH. I waited 24 hours before trying the oil-based Poly final step (I wanted a glossy finish). That thing sucked that poly down into the depths of its soul like a Neil Gaiman monster.
I was mystified.
Back to the internet, where I found out that when some people say "tung oil" what they REALLY MEAN is "tung oil finish" which is a product with chemical drying additives that cure the oil faster. REAL tung oil finishes can take weeks. So into the guest room it went for a few weeks of curing.
When I brought it out and put the poly on again, I held my breath, but the beautiful, shiny finish was perfect.
The unique thing about Unicorn SPiT is that a varnish of any kind - the more the better - deepens the 3D effect of the wood grain. Their videos show really cool things happening when you put thick epoxy over the stain. I only had the patience for 3 coats of poly, but each time, I could see more dimension and depth and just absolutely loved it when I was done.
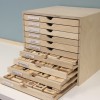
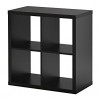
So without further ado - here she is. It comes with ten drawers and is sized to fit an
IKEA Kallax.
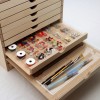
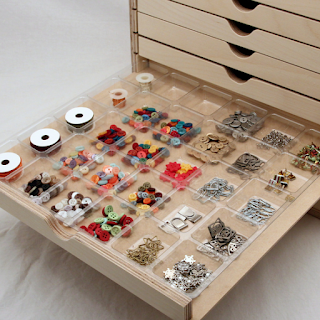
The REAL reason I wanted it is the accessory trays they sell. Each tray fits in the drawers and holds 54 mini ink cubes. I just really like using the cubes better with the MISTI - way less messy.
So here are my
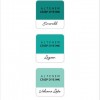
Altenew mini inks.
And here are my
Stampin' Up! inks. Well one drawer of them. The rest of the rainbow is in the drawer below this one. :)
I have one drawer full of
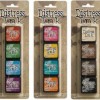
Distress mini ink cubes, and one full of
Hero Arts and
Simon Says Stamp cubes. One drawer has my
blank cubes in it.
So I still have FOUR TRAYS EMPTY - for only being 13x13 - this thing packs a GINORMOUS storage punch.
Now they have two different accessory trays.
There's
this one - for either inks or embellishments.
But I went with
this one - because I knew it would maximize the space for ink, and that was my intention.
The trays are amazing and super inexpensive - they are also why the drawers don't have sides, which I think is genius.
I could not be happier with the way this came out.
Here it is in
my Kallax. This is right outside the door to my tiny studio - and the blue just beckons :).
I'm trying to fight the urge to buy three more and do some more stain experimentation :)
Fantastically fun refinishing process and amazing storage solution.
What? Did I hear someone give me permission to go buy more inks for the rest of those drawers?
Yes - I think I did. BRB.
LoveyameanithappyStPatricksDaybye.

