
*Compensated affiliate links used where possible at zero cost to you. No posts are ever sponsored or paid.*
Something very fun is coming in tomorrow's blog post and I'm here with both a preview of that AND my Happy Halloween ZOMBIE landscape video! Santa and zombies - what could be better?
So let's start with Santa and work backwards. This is a little sneak peek of the Hero Arts kit and the amazing tag dies in it. For my sneak peek, I decided to make an ornament instead, because I have such a soft spot for homemade Christmas ornaments. These dies make it all super easy! I decided on felt for my ornament. I use this felt glue to assemble it after cutting the pieces out. This is where I buy my felt - you really need wool felt to get clean cuts with dies - don't use that stuff from big box craft stores - it won't cut as cleanly.
Isn't he cute?

Now I wanted to reinforce the back, since the felt is so soft, so I used the oval infinity dies, and then also punches with holiday glitter paper to reinforce the hanger and the main portion of the Santa. The oval dies have a perfect match for the face!

|


So come back tomorrow for more fun ideas for the kit and some other cool holiday stamps.
But now - IT'S HALLOWEEN! Happy Halloween! We are having STUNNING Halloween weather, and the AC hasn't run in days. The whole year has been much cooler than normal, which is great because that lower utility bill money turns into ART SUPPLIES through transmogrification that scientists have yet to understand. And it's none of their business anyway.
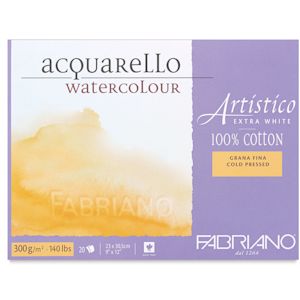
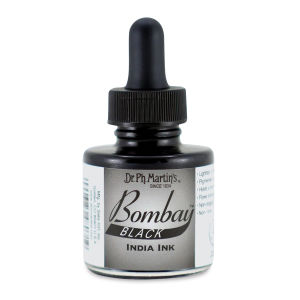
I found a super fun way to create spooky landscapes with india ink on watercolor paper - I won't spoil it for you - you can watch the video - but it's MAGICAL. I went to the East Austin studio tour YEARS ago and saw a similar effect that an artist got with salt and ink, but I've never been able to reproduce that at all. So I was super excited that this particular chemistry did what I wanted it to. This first card, the only thing I did was add the zombies from this set. SPOOKY. I am NOT responsible if the hair on the back of your neck stands up. Muahahahah! Look at the little lightning bursts around the clouds above some spooky zombies on the beach!

Here's another example - I really love how pronounced the lightning and the surf are in this one!

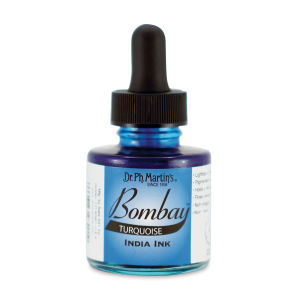
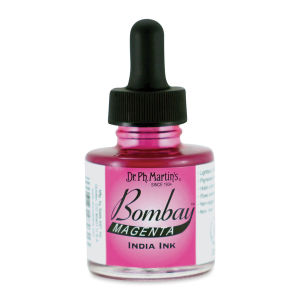
I tried this blue and magenta ink on this sample, and it's just magical. To me it seems like the details are softer, but I'm not sure if that's because of how much water I used, or if the different pigments act differently - I need more experiments!

I'm so addicted to this look!
Here are all the products I used to create these - and the video & a Halloween joke are below!
|


So here is the video for this spooky technique!
Now for some SUPER corny Halloween jokes and one of my fave fall recipes!
Q: What does a ghost panda eat?
A: BamBOO
Q: How do you fix a broken jack-o-lantern?
A: With a pumpkin patch!
Now for one of my fave fruit dips from back in the days when I had parties!
This is so yummy if you have some nice tart apples - that's my fave way to eat it. And most vegan cream cheese is great so it's allergy and vegan friendly.
- 8 oz. plain cream cheese
- 2/3 C. peanut butter (I use Santa Cruz Organics with no sugar because the fluff is sweet enough. I love it both with creamy and crunchy)
- 8 oz. marshmallow fluff - there's a fun vegan one in Austin now - called Funky Mello. So yummy and their customer service is amazing.
I like to use a mixer to get it super smooth. Then just put it in the fridge until you are ready. Serve with fruit, but tart apples and bananas are my faves with it!
Anyway - I hope you have a great Halloween! I love this holiday and I'm sad it ends today - but don't think there won't be all year zombies, because there will!
Loveyameanitbye.
Like this post? Never miss a post by following me!
CURRENT COUPON CODES
15% off anything at Marker Universe or any of their other sites - Understandblue15.
10% off at Sweet Sentiment with code UNDERSTANDBLUE
10% off the whole store at A Colorful Life Designs - LydiaFan10
5% off at LBC here with code LYDIA5
Phone stand for filming link below in the banner - 20% off sitewide with code UNDERSTANDBLUE

Love the felt idea!
ReplyDeleteLydia, I love your ornament and I appreciate that you mention where you buy the felt. It happens that I have a few rolls of that felt and plenty of Hero Arts glitter cardstock among others. I can’t wait to see the entire kit. Beautiful ornament.
ReplyDeleteLydia, I love your ornament and I appreciate that you mention where you buy the felt. It happens that I have a few rolls of that felt and plenty of Hero Arts glitter cardstock among others. I can’t wait to see the entire kit. Beautiful ornament.
ReplyDeleteWonderful use of felt & good idea to back up the felt for more sturdiness.
ReplyDeleteMelissa
"Sunshine HoneyBee"
Cute ornament. I like the idea of reinforcing the felt for stability. Plus it looks nice and neat that way. This kit is so cute.
ReplyDeleteI think your felt ornament is adorable and I appreciate the wool felt tip. I never knew that. I also found your ink backgrounds awesome. I'm pinning that one for next year!
ReplyDeleteHow very cool!!!
ReplyDeleteSo adorable great idea to do with my GrandBabies. Thanks
ReplyDeleteLove the Hero Art faces. Make cute
ReplyDeletecards that can be displayed on the
mantle or the tree. The "ink"
pieces are spooky. Fangtastic job.
thanks for sharing
txmlhl(at)yahoo(dot)com
Making ornaments is a great idea! This looks like a great kit!
ReplyDeleteTFS! Great ideas and love the outcome!!
ReplyDeleteThat is a great idea making ornaments with these cute critter/snowman dies. That red felt cut beautifully & just takes the Santa to another level.
ReplyDeleteIt’s good to know that these dies can be used on felt! Great idea! Thanks for sharing.
ReplyDeleteThe felt Santa is adorable!
ReplyDeleteWhen I saw the photo, I immediately thought it looked like felt, and wondered if that were possible...and you've proved it is! What a great idea.
ReplyDeleteLove the idea of making ornaments. Ai think Santa needs some pupils though - he looks hypnotised. LOL
ReplyDeleteGreat idea! This ornament is a great project.
ReplyDeleteWhat a great idea to make this tag into an ornament! Thanks for the tips about felt also. ;-)
ReplyDeleteThat's what I thought could be done with the dies- make ornaments! Love that cute Santa ornament!
ReplyDeleteLove your Santa card!
ReplyDeleteOh boy new ornaments for my old tree. Awesome Halloween card too. Thanks for the inspiration.
ReplyDeleteI would love making a Santa out of felt.
ReplyDeleteLove your felt tag. And the Zombie background is great...I'm going to have to come back and try that one.
ReplyDeleteLove the felt ornament! Cute idea!
ReplyDeleteI love the idea of using felt to create the ornament, very cute.
ReplyDeleteLove the ornament! Your spooky zombie landscape is awesome and I appreciate your jokes and enthusiasm for Halloween...I share it!
ReplyDeleteYour tag is adorable. Love the idea of using felt.
ReplyDelete