*Compensated affiliate links used where possible at zero cost to you. No posts are ever sponsored or paid.*
You know how some people live for the next episode in their favorite movie franchise?
Or for the next collectible Starbucks cup?
Or for their team to win the XYZ championship?
THIS IS HOW I LIVE FOR HALLOWEEN.
I have loved this holiday since I can remember any experience of life on this planet, and have zero intention of changing any time soon.
Prior to stamping, I didn't really have a way to indulge my obsession in the leadup to the event. BUT NOW I DO.
NOW, I can start my spooky shenanigans in July, when all of the delightfully creepy, cute and everything in between images start to make their way into stores.
NOW I can be who I am meant to be the rest of the year - that person who LOVES the sights and sounds of all things October.
So sit back and let me show you around the place today!
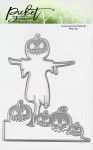
First up - LITERALLY THE SCARIEST THING ON EARTH - a combination of a scarecrow AND the Headless Horseman - muaahahahahha!!!
I used
this amazing scarecrow cover die to cut out this tableau from watercolor paper. Then I painted it with Daniel Smith watercolor. I added white acrylic paint and
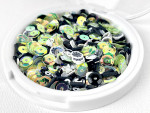
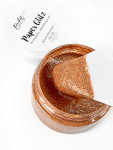
Sparkle Paper Glitz for the SUPER creepy moonlight! I scared my own self making this card. I used my
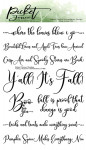
circle infinity dies to cut a partial circle out of a panel of black cardstock, and sponged grey ink onto the white card base to make a texture on the moon before stamping
the sentiment from this set. If there was a way I could get away with sending this as my Christmas cards, I would, but I know that I probably couldn't :). I just love it.
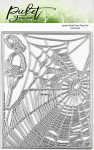
Since I've walked face first into like a hundred spiderwebs this week, this felt very on point.


Here are all the supplies I used today. Come back for a cookie recipe!
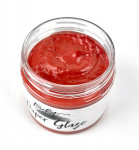
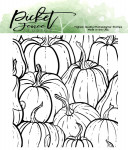
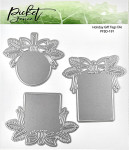
| Scarecrow Cover Plate | Fancy Autumn Sentiments | Paper Glitz - Sparkle – Picket Fence... | DI199 Nesting Circle Infinity Dies... | You Creep Me Out | You Creep Me Out Die | Slim Line Short Grass Die – Picket... | Graphit — Marker Universe | Spider Web Cover Plate | Happy Fall Y'all | Be Spooky Together | Midnight Tales | Reversed Leaf Stencil | Autumn Persimmon Paper Glitz | Poinsettia Red Paper Glaze | All the Gourds | nadia remix | Lawn Fawn | Holiday Gift Tags | Nesting Dolls | Nesting Dolls Die | Merry Christmas Word Topper Die | Joyeux Noel | Understand Blue MINI Slimline Folded... | Understand Blue Slimline Folded... | Understand Blue Card Making Bundle #3... | Understand Blue Card Making Bundle #1... | Understand Blue Card Making Bundle #2... | Art Anthology BIG CRAFT MAT 24x36 311473 | MISTI Stamping Tool | Rotatrim Professional Series Cutter -... | Teflon Bone Folder - Ellen Hutson LLC | Crafter's Companion GEMINI... | Scor-Pal MINI SCOR-BUDDY Scoring... | Storage Envelopes, Medium 25pk,... | CheckOutStore Stamp & Die Clear... | Extra Large -50 pk, Avery Elle Stamp... | Lawn Fawn STAMP SHAMMY Cleaner LF1045 | Airtable: Organize your stamps & dies |
| |
Do you love oatmeal cookies as much as I love Halloween?
This is most definitely the recipe for you! I recently made these with half raisins, half dried cranberries and they were DIVINE! These also freeze really, really well - I almost always freeze 90% of a batch of cookies because who in the world were those portions made for? Future you will love you for your frozen cookies!
1 1/2 cups all-purpose flour
1 teaspoon ground cinnamon
1/2 teaspoon salt
1/2 teaspoon baking soda
1/2 teaspoon baking powder
1 cup (2 sticks) unsalted butter, room temperature
1 cup dark-brown sugar
1/2 cup granulated sugar (there’s a small chance I accidentally used a cup while on the phone - and they were great!)
2 large eggs
1 teaspoon pure vanilla extract
2 cups old-fashioned rolled oats
2 cups dried sour cherries OR 1 C. raisins and 1 C. dried cranberries
Preheat oven to 350 degrees. Line baking sheets with parchment paper; set aside. (These do NOT work on a non-stick cookie sheet - parchment is a must) In a medium bowl, whisk the flour, cinnamon, salt, baking soda and baking powder; set aside.
Beat the butter and sugars until light and fluffy, 1 to 2 minutes in your mixer with a paddle attachment. Add the eggs and vanilla, and beat to incorporate. Add flour mixture to butter mixture, beating on low speed to combine. Stir in the oats and dried cherries.
Drop the dough onto prepared baking sheets, leaving 6 inches between cookies. Bake until edges are just turning brown, about 20 minutes. Cool 2 minutes on baking sheet, then remove to wire racks to cool completely.
Hope you make these soon! Loveyameanitbye.
Like this post? Never miss a post by
following me!
CURRENT COUPON CODES
15% off anything at
Marker Universe or any of their other sites - Understandblue15.
10% off at
Sweet Sentiment with code UNDERSTANDBLUE
10% off the whole store at
A Colorful Life Designs - LydiaFan10
5% off at
LBC here with code LYDIA5
Phone stand for filming link below in the banner - 20% off sitewide with code UNDERSTANDBLUE


I’m loving your spooky Halloween cards! You never disappoint. And I appreciate the oatmeal cookie recipe… I’ve been feeling like baking lately. Thanks Lydia😘
ReplyDeleteI sent my comment to the wrong place-it went to last years fall leaf card I think. I could not understand why no one was talking about the halloween cards! (Guzzling caffeine now) So you should dump that one.
ReplyDeleteI love Halloween bc we get one of the best parades of the year in the city but also bc of people who get into it like you bc it shows in the work-that pumpkin scarecrow is one of the coolest things I have seen in years, went right into my wishlist along with the ghost stamp. I like the scary moonlight you did too. Stick some santa hats on them! Night before Christmas look! :)
Oh I love love love these cards. I'm inspired now to start making my Halloween cards. Halloween is also my favorite holiday. I deck the house out like crazy... even if no one comes over, I enjoy it. My problem is... no one else I know really loves Halloween, so I make a bunch of cards and have no one to send them to! I do love oatmeal cookies, too... so thank you for the recipe!
ReplyDeleteSure you can use the first card for your Christmas cards...change the color of the scarecrow's clothes, the sentiment, and pop Santa hats on all the jack-o-lanterns! Boom. Christmas card. Done. :)
ReplyDeleteHalloween is my favorite card-making occasion of the year! Love the cards you create and I'm especially loving your awesome scarecrow card! The cookies sound yummy.. I might have to try those!
ReplyDelete