Tuesday, December 17, 2019

A10 Money Holder Holiday Cards + The Best Gadget EVER

So my brother in law commissioned some holiday cards for me. He loves to give cash to his nephews and nieces, so he needed larger cards, and asked me if I could make six of them - two for Hanukkah and four for Christmas.

It was cool to do something that was just for fun, and in a size I don't normally work with.

I don't know what everyone else does for A10 or "slimline" cards, but I cut them so that they are 9.25" x 3.75" when folded, so you cut the paper to 9.25 x 7.5. I did a little poll on Stamp Junkies, and it seems like lots of different terms and sizes exist for this type of card. I've been stamping a longggg time and have never heard a commonly accepted term, so now's our chance! I hesitate to make that A10 because those paper sizes are so different in Europe than what cardmakers here use.

ANYWAY - come up with a cute name and let's make it happen!

So for the Hannukah cards I was inspired by a post in Stamp Junkies by Adam Karle. He used strips of cardstock for a blue striped Hanukkah card and it was gorgeous! I decided to do my take with Life Changing Blender Brushes, Post-It tape and create an abstract menorah. That's why there are 9 blue stripes and the rest is white. I just randomly taped off areas and used Sea Glass, Blue Raspberry and Blue Denim ink with the brushes to create the abstract candles. I used the no-shed glitter paper, the happy die and the Hanukkah from this sentiment only set to finish the card. 
 For the second one, I just used a different glitter paper for the greeting.
 I've had this hilarious set of Santas for MONTHS and just now had a chance to use it. For the rest of the cards I also had a common element - snowy hills. I hand cut them from masking paper and used Life Changing Blender Brushes and Sea Glass ink for the skies for the next four cards. I stamped and die cut my crazy Santa, and made some Copic shadows for his skis before gluing him down. Then I stamped the sentiment from the same set on the hills.
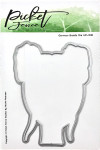
 The next card features the adorable deer from On a Christmas Walk, and the sentiment is from the same set. I gave him a little shadow too. I reused the same mask.
 The tiny Merry Christmas here is the same one from the other day, and I just made the adorable birdies from this set opposite colors.
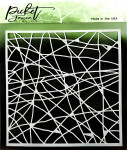
All the envelopes got the same treatment - I used this stencil (10% off all stencils there with code LydiaFan10) and brushed Sea Glass over almost half of them, because there's nothing more boring than a white A10 envelope, right?

The last card features the sweet bunny from this set, and the sentiment from this set. Stay tuned below for supplies and the COOLEST home gadget I've ever owned, which you might think is the most boring thing in the world, but it's not, I promise.



Circle Stripes - A Colorful Life Designs
[ CLD ]
The Season of Giving - Picket Fence...
[ PFS ]
The Season of Giving Coordinating Die...
[ PFS ]
On A Christmas Walk - Picket Fence...
[ PFS ]
On A Christmas Walk Coordinating Die...
[ PFS ]
Wishes Stamp & Cut
[ HA ]
Happy Message Fancy Die
[ HA ]
Your Gift - The Cat's Pajamas PaperArts
[ THC ]
Sketchy Santa Bundle - The Cat's...
[ THC ]
Post-it 658 Labeling & Cover-Up Tape,...
[ AMZUS ]
Avery Removable Label Paper
[ AMZUS ]
Life Changing Blender Brushes. 4 Pack...
[ PFS | ELH | SSS ]
GKD Color Companions Ink Pad- Blue...
[ GNK ]
GKD Color Companions Ink Pad- Blue...
[ GNK ]
GKD Color Companions Ink Pad- Sea...
[ GNK ]
Neutrals Glitter Paper Pack - Concord...
[ C&9 | SSS | ELH ]
Amazon.com: Kamenstein 5204110...
[ AMZUS ]
Art Anthology BIG CRAFT MAT 24x36 311473
[ SSS ]
Heavy Base Weight Card Stock- White
[ GNK ]
MISTI Stamping Tool
[ HA | MSP | SSS | MFT | ELH | UNT ]
Rotatrim Professional Series Cutter -...
[ BLIC ]
LightView 2in1 LED Magnifier for...
[ BRG ]
Mudder 10 Pack White Buffer Sanding...
[ AMZUS ]
Xyron ADHESIVE ERASER 23675
[ SSS | ART | AMZUS ]
Teflon Bone Folder - Ellen Hutson LLC
[ ELH | SSS ]
Crafter's Companion GEMINI...
[ SSS ]
Scor-Pal MINI SCOR-BUDDY Scoring...
[ SSS ]
Essentials by Ellen Storage...
[ ELH ]
Die Storage - Clear Storage Pockets...
[ CHC ]
XL Stamp Storage Pockets
[ ELH ]
Mermaid tidy towel case and glue...
[ ETS ]
Ink Off Cloth
[ INK ]
Lawn Fawn STAMP SHAMMY Cleaner LF1045
[ SSS | CST ]
Airtable: Organize your stamps & dies
[ ART ]


So you ready for the coolest version of the most mundane gadget ever?

At my fall retreat, I went to get a paper towel and as soon as I grabbed it, my life changed forever. YES, I AM BEING DRAMATIC.

I HATE my paper towel holders. I have two of them. One had that little stick thing that's supposed to hold the towels flush, but it was too tight, so when you grabbed the paper towel the whole holder came flying off the counter with it and you STILL didn't get a paper towel.

The other one that works has a stupid thing on top that takes 45 minutes to unscrew every time you want a towel.

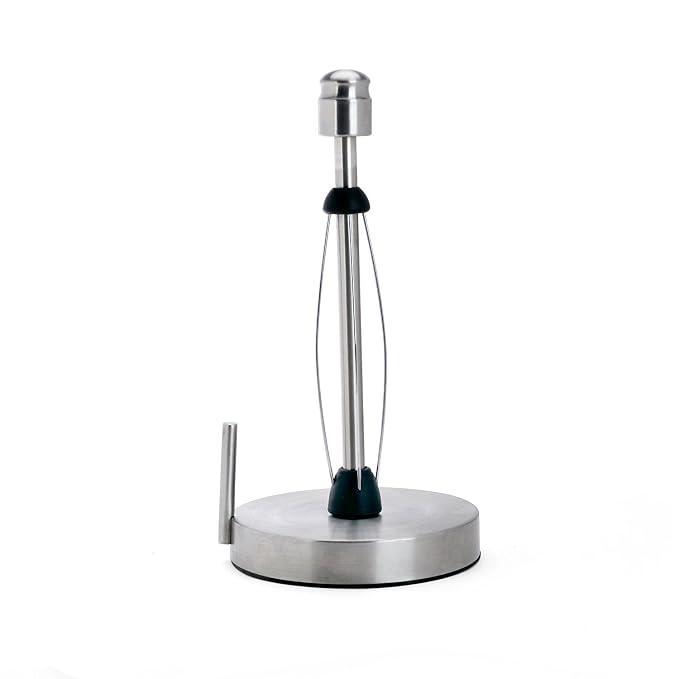
So when I went to get the paper towel, I heard a clicking sound - there's a RATCHETY thing inside, and that means you can get paper towels off this thing with ONE HAND. The roll doesn't spin loose on the base, the ratchet just responds to you pulling, whether you want a half towel or a full towel and it's MAGICAL. So in the midst of all that beautiful art, I was the one in the corner, surreptitiously taking photos of a paper towel holder.

It's not cheap, but I've suffered long enough with the cheap ones.

So Merry Christmas to me - I have two now! It's 100% perfect for your art room because you can grab it one handed when you're covered with paint and not get the whole roll all messy which I inevitably do! You can get them here on Amazon in time for Christmas. I love this thing so freaking much. I'll add it to my favorite things list (if you're on mobile, hit the menu to see that page) as well. 

I guess I'm "get excited over a paper towel holder" years old today!

Loveyameanitbye.

Sunday, December 15, 2019

SERIOUSLY - Merry Christmas + A Recipe

I love seeing photos of Santorini. That's a place I'd really like to go someday - all that white and blue just make me happy. I'd really like someone to get all over that teleporter technology we were promised.

How awesome would it be to just pop over there for a few hours - just for lunch? Or to snap some inspiration photos for your watercolor?

Pretty awesome, I think.

But for now, I have to get my inspiration from Google.

So that's what I did for this card. This city background stamp was perfect for a little Greek interpretation. In Santorini, there are those gorgeous domed blue roofs, but also little blue accents on railings and around windows and doors, sort of like in Santa Fe.

The blue is quite intense - I couldn't really find a good Copic match for it. Looking at photos, Cobalt blue pops into my mind, but having actually painted with true Cobalt, it doesn't match my perception of cobalt blue at all. It's not Ultramarine either. So I just picked a blue I liked and went with it.

After I colored the whole card front, even though it was painful, I cut a section out of the middle big enough for the Seriously die cut and added the tiny Merry Christmas from this set - we used this set and the coordinating dies in class last Saturday.
The cake set this month is so fun. I decided to do the spotlighting technique to show the contrast between the bright happy world with cake in it, and the dark and sad world we'd have without cake.

First, I stamped the image in black, and then used the 2.5" blending stencil - the mask portion, to cover up part of the cake, while I brushed on Morning Mist ink, trying to keep it darker near the cake with little foggy bits. Then I removed the mask, and took the negative part of the stencil and placed it around where the mask had been and used a Micron pen to outline the circle around the image. Then I colored the part that was spotlighted with Copics.

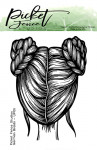
Then I took the latest in their braids series - German Braids and colored them purple like my friend Dana's hair! We made this card in class last weekend, brushing on Key Lime ink through the Points of Interest Stencil. I stole Ceal's idea from last month's girl - she made a necklace for her out of chunky glitter, so I did the same with rhinestones this month. The sentiment is just a single stamp new this month and sure to be used all year. I like how big it is. I'm getting blind in my old age.
You can see beautiful cards from the rest of the release here!

All the supplies I've used are below, and below that, the modifications I made to the recipe I posted the other day - I ate it yesterday and OMG is it delicious. I'll be back on Monday with some fabulous non-crafty Christmas gift suggestions!


A City in the World
[ PFS ]
Seriously Word Die
[ PFS ]
The Season of Giving - Picket Fence...
[ PFS ]
The Season of Giving Coordinating Die...
[ PFS ]
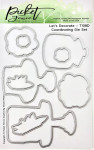
Let's Decorate
[ PFS ]
Let's Decorate Coordinating Die
[ PFS ]
German Braids
[ PFS ]
German Braids Coordinating Die
[ PFS ]
Points of Interest Stencil
[ PFS ]
I Love You The Mostest
[ PFS ]
Art Anthology BIG CRAFT MAT 24x36 311473
[ SSS ]
2 Blending Stencil - Picket Fence...
[ PFS ]
Tsukineko VersaFine Clair MORNING...
[ SSS ]
GKD Color Companions Ink Pad- Key...
[ GNK | SSS ]
Heavy Base Weight Card Stock- Key Lime
[ GNK ]
Heavy Base Weight Card Stock- White
[ GNK ]
MISTI Stamping Tool
[ MSP | HA | SSS | ELH | MFT | UNT ]
Rotatrim Professional Series Cutter -...
[ BLIC ]
LightView 2in1 LED Magnifier for...
[ BRG ]
Teflon Bone Folder - Ellen Hutson LLC
[ ELH | SSS ]
Crafter's Companion GEMINI...
[ SSS ]
Scor-Pal MINI SCOR-BUDDY Scoring...
[ SSS ]
Essentials by Ellen Storage...
[ ELH ]
Die Storage - Clear Storage Pockets...
[ CHC ]
XL Stamp Storage Pockets
[ ELH ]
Mermaid tidy towel case and glue...
[ ETS ]
Ink Off Cloth
[ INK ]
Lawn Fawn STAMP SHAMMY Cleaner LF1045
[ SSS | CST ]
Airtable: Organize your stamps & dies
[ ART ]

Butternut Squash Stuffed Shells with Sage/Thyme Brown Butter


Original recipe here, via Bev Rousch. I modified this to be dairy and garlic-free. DELICIOUS. I think it would make amazing lasagne filling.

INGREDIENTS
  • 1 large butternut squash (Pfft - yield of 1.5 lbs of mashed squash is perfect)
  • 1-2 tablespoons olive oil (You don’t really need this much - I cooked my shells ahead so I brushed a bit of oil on to keep them from sticking together in the fridge)
  • 15 jumbo pasta shells (that’s what my lasagne pan holds)
  • 2 containers Treeline Scallion cashew cheese
  • 1/3 cup Pimp My Salad Cashew Parmesan (dairy free)
  • 1/2 cup packed fresh spinach (chop after measuring)
  • 1 large egg
  • 1 teaspoon salt
  • 1/2 teaspoon pepper
  • Crushed pepper or cayenne
  • Zest and juice of 1 lemon
  • 1/2 cup Miyoko’s butter (1 stick/8 TBS) (I thought this was a lot - I did half this and half a lemon)
  • 8-10 fresh sage leaves (I did thyme because my sage died this year)


INSTRUCTIONS
Preheat oven to 350. Place whole, washed squash on a deep cookie sheet or in a casserole dish on parchment paper. I’ve been doing this for 30 years and never had a squash explode, but if paranoia has taken hold in your mind, you can cover the squash with foil. Cook until very soft to the touch - just squeeze with a potholder. Cut in half, scrape out seeds and mash the squash. Let it cool to warm room temperature before using in the recipe (this step can be done 2-3 days in advance and the cooked, mashed squash can be stored, covered, in the refrigerator). Raise the oven temperature to 400 degrees F.

Cook the jumbo pasta shells according to package directions and drain. In a medium bowl, combine the squash, scallion cheese, spinach, egg, salt and pepper, red pepper and fresh lemon zest. Stir well. Stuff the cooked pasta shells with the squash/cheese mixture and place them in a lightly greased 9X13-inch baking dish (depending on how full you fill the shells, you may not use all of them). Bake the shells for 18-20 minutes, until they are hot all the way through.

While the shells are making, prepare the brown butter sauce by melting the butter in a saucepan or skillet over medium-low heat until the butter is golden brown, about 10-12 minutes. Watch carefully as the butter can go from browned to burned in a short time. Add the sage leaves and cook until the leaves are slightly crisp (the butter should be hot and bubbly when adding the leaves so that the sage cooks quickly). Remove the pan from the heat and squeeze in the juice of 1 lemon.

Drizzle the sauce over the cooked shells and top with additional grated Parmesan, if desired. Serve the shells with 1-2 crisp sage leaves on top.

Loveyameanitbye
Related Posts Plugin for WordPress, Blogger...