Friday, September 30, 2022

VIDEO: Black & White Halloween Card + WCMD Live Info

*Compensated affiliate links used where possible at zero cost to you. No posts are ever sponsored or paid.*

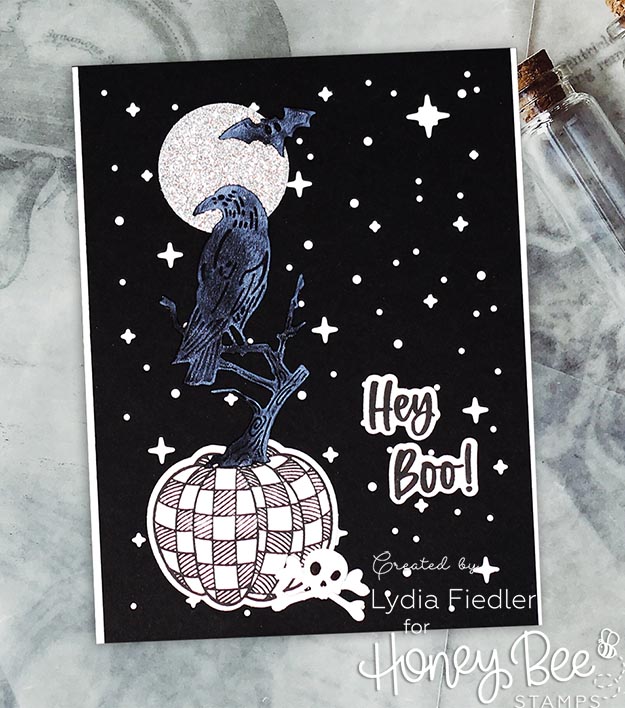
Y'all know how I feel about black & white! It's pretty much my favorite! That's not to say it's the easiest to design with, because you can have some challenges, so I have a video for you today with some fun ways to design an all black & white Halloween card. I love Halloween COLORS - the neons, the orange and purple - all of it. But black & white has so much gravity, I could not resist. 

I used this background die for stars - I think this is a Christmas die, but look how cool it is for a spooky dark sky! I combined these dies with embossed details for the bat and the crow, and put that branch onto this cute checkered pumpkin as the stem. The sentiment is from this set, and I used silver glitter paper for the moon. THAT BAT CRACKS ME UP! I do love my bats. He looks like the little Spy vs. Spy characters from Mad Magazine. Remember that? Ahh the days of magazines.

I rubbed white ink over the crow and bat to make their details pop. 


Like this post? Never miss a post by following me!

Here's the video!


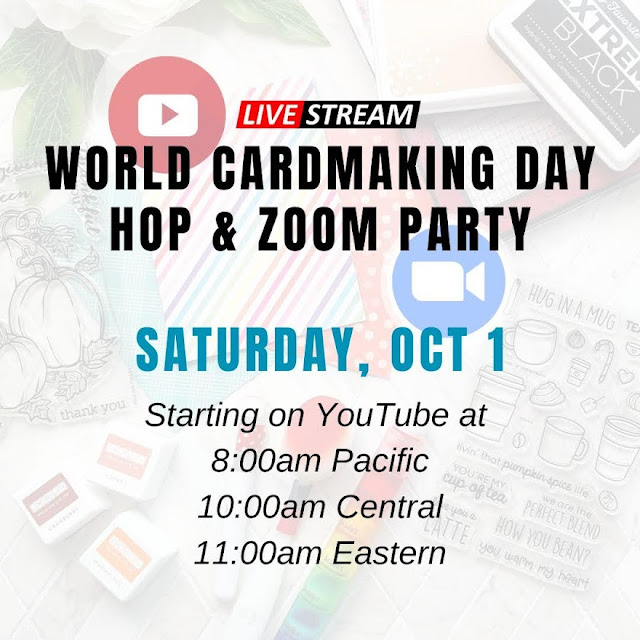
Hope you will be joining me tomorrow for this!! I'm on at 11 AM Central, but you will want to start at 10 AM Central HERE at the beginning. My video will be live HERE. Leave comments for your chance to win! 


Loveyameanitbye.

CURRENT COUPON CODES
20% off anything at Glassboard Studio  - UNDERSTANDBLUE.
10% off anything at OLO MARKER
15% off anything at Marker Universe or any of their other sites - Understandblue15.
10% off at Sweet Sentiment with code UNDERSTANDBLUE
10% off the whole store at A Colorful Life Designs - LydiaFan10
5% off at LBC here with code LYDIA5
Arkon Mounts - 20% off sitewide with code UNDERSTANDBLUE


Tuesday, September 27, 2022

Easy Hack for "Portrait Mode" Cards

*Compensated affiliate links used where possible at zero cost to you. No posts are ever sponsored or paid.*

I wanted to share one of my favorite hacks today with this adorable bunny and sketched woods stamp. I call it my "portrait mode" hack. Well it's ONE of my portrait mode hacks. I have another hack here. (You may recognize that card as the cover for one of my community groups on Facebook :) ).

This one is a little simpler, but just as effective!

If you are not an iPhone user, when I say "portrait mode" I'm referring to a camera setting that mimics a low f-stop setting on a traditional camera - where just the focal point is sharp, and the background is more soft focus. You can see an example of this type of photo here

My trick is easier than photography though because it's just about ink. All you have to do is stamp the background in a SLIGHTLY lighter color than the foreground.

In this case, I stamped the bunny in a nice crisp black ink and masked him. Then I used this SUPER neutral brown ink - I love this ink for this technique, because it's really neutral and the perfect contrast to black - to stamp this fun sketchy background stamp over him. 

Before removing the mask, I ink blended the background, even adding a little white paint pen for highlights.

Then I removed the mask and colored his ears, his nose and his shadow with OLO Markers.


Like this post? Never miss a post by following me!

Speaking of markers, I decided to bring back an OLD technique for the next card, and I want you to notice something on this card. For the tree in the back, I used the exact same technique as the tree in the front, but see how there's like a granular detail on that tree? That is because the stamp was brand new - it had never been used and so the markers I used were beading. By the time I moved to the second tree, the stamp was conditioned, and so it has a more impressionistic feel.

Stamps are conditioned by stamping. No sanding, eraser etc. needed. USE the properties of a brand new photopolymer stamp as a technique when you first get them! I've never "conditioned" a stamp aside from stamping it a few times, but it still is a common question, so I wanted to show you that you can use it to achieve a certain look.

The markers I used (discount codes below) were Karin Brushmarker Pros and the Decobrush pigment markers. These two work so beautifully together in layered stamping like this - where you add a little color, stamp, add a little more, etc. Impossible without a MISTI, in my opinion, and hey - did you see the new black MISTI that comes with all the features of the 2.0? I can't wait for mine to arrive.

The sentiment is from the same beautiful set the trees are from.


CURRENT COUPON CODES
20% off anything at Glassboard Studio  - UNDERSTANDBLUE.
10% off anything at OLO MARKER
15% off anything at Marker Universe or any of their other sites - Understandblue15.
10% off at Sweet Sentiment with code UNDERSTANDBLUE
10% off the whole store at A Colorful Life Designs - LydiaFan10
5% off at LBC here with code LYDIA5
Arkon Mounts - 20% off sitewide with code UNDERSTANDBLUE

There are more critters in that bunny set too. So cute. 

For those of you in Florida and Georgia - I hope you have everything you need tonight and can stay safe for a few days. There's no stress like hurricane stress.

I thought we were going to get through 2022 without a big one. Next year maybe. Be safe.

Loveyameanitbye.


Monday, September 26, 2022

Please Don't Read a Book In Central Park at Night, But....

*Compensated affiliate links used where possible at zero cost to you. No posts are ever sponsored or paid.*

I'm taking a break from holiday stamping to bring you some WABBITS. One of my fave artists has some new ones, and, just as exciting - there's a new 4x6 background to scene build with. 

So since those go together like peas and carrots, I decided to plop my little bunny with a book into Central Park! Reading a book at night in Central Park is safe ONLY for wabbits - please don't try this yourself! I colored the park background super simply with OLO Markers, leaving the sky white. Then I stamped the scene on masking paper and cut out the horizon and buildings and masked that. I ink blended a night sky, that I splattered with white paint. I die cut a little moon and glued that on.


Like this post? Never miss a post by following me!

The little ballerinas she did are so adorable! I thought about doing a Degas style scene at first, similar to what I did here, but as I studied the style - the clean line and the detail in the bunnies, I decided instead to separate them from a colorful background and leave them uncolored. The OLO Marker dots give it a festive feel - the bunnies look pretty festive.

CURRENT COUPON CODES
20% off anything at Glassboard Studio  - UNDERSTANDBLUE.
10% off anything at OLO MARKER
15% off anything at Marker Universe or any of their other sites - Understandblue15.
10% off at Sweet Sentiment with code UNDERSTANDBLUE
10% off the whole store at A Colorful Life Designs - LydiaFan10
5% off at LBC here with code LYDIA5
Arkon Mounts - 20% off sitewide with code UNDERSTANDBLUE


I made an amazing acorn squash recipe from TikTok last week. I honestly think this would be delicious with any fall squash like butternut too - it's all in this delicious sauce that goes on it.

However, I do NOT eat the skin of acorn squash, and I found the way that she sliced the squash made it messy and hard to eat because you have to try to peel off tiny strips of the rind. Since she has you nuke the squash to soften it for cutting and cleaning (I use the oven for this part, like I do with all squash - never cut a raw squash if you like your fingers to stay attached to your hands), I would vote for removing the skin at this stage as well.

The lime and chile are so amazing with the sweet squash flavors. Just yummy I hope you try it. Here's a link to the original with my notes.

Loveyameanitbye.


Friday, September 23, 2022

VIDEO: Part 2 - Hybrid Coloring with the Complex Masking Scene

*Compensated affiliate links used where possible at zero cost to you. No posts are ever sponsored or paid.*

I'm back today with the second video in my mini series. In the first video, I showed you complex masking of this scene, and today, I'm using OLO Markers and colored pencils to finish this sweetness right up! Before you get nervous about coloring, let me just tell you THIS COULD NOT BE SIMPLER. You will see in the video. It requires no skill other than patience. 💙

Here's the finished card. If you missed it - the stamp set is here


Like this post? Never miss a post by following me!

Here's the video!


Loveyameanitbye.


CURRENT COUPON CODES
20% off anything at Glassboard Studio  - UNDERSTANDBLUE.
10% off anything at OLO MARKER
15% off anything at Marker Universe or any of their other sites - Understandblue15.
10% off at Sweet Sentiment with code UNDERSTANDBLUE
10% off the whole store at A Colorful Life Designs - LydiaFan10
5% off at LBC here with code LYDIA5
Arkon Mounts - 20% off sitewide with code UNDERSTANDBLUE


Wednesday, September 14, 2022

Correction! More Die Cut Only Holiday Cards + Bulgogi Meatball Recipe

*Compensated affiliate links used where possible at zero cost to you. No posts are ever sponsored or paid.*

I'm back with MORE die cut only holiday cards today. I guess I'm in a phase, officially! OR maybe there are just some really pretty holiday dies that I'm drawn to right now. Or maybe both. 

I spent the weekend paper piecing the cards I showed you earlier this week and also these. SO much relaxing. I started listening to the American Scandal Podcast - the episodes on Dow Chemical - WHOA. Highly recommend. I get so absorbed in those stories while I'm crafting and then it's suddenly 6 PM!

I also Marie Kondo'd the very last closet in our house. JUST prior to March of 2020 I was on a Kondo TEAR through the house, and I did all the closets except one - the closet in my former guest room, which is now my craft annex. I didn't really bother with that because I didn't need the space, but now I really do, so I went to town this weekend. 

My entire porch was filled with fun stuff for members of my Buy Nothing group all weekend. Lots of Halloween costumes, some cardstock, a shoe rack, some shoes, some old card kits from my retreats - NEVER toss those - moms of crafty kids and teachers LOVE them. I also found two Z Becky Brown purses with my own artwork in them and people loved those. You can see the two I gave away here and here. It was so fun to see people super excited over something instead of just driving to Goodwill. If you aren't a member of your local Buy Nothing Group, I'm begging you again!

We caught a GIANT buck on one of our security cameras last week. I'm obsessed with the way their antlers grow. He was a big boy - and we've seen him before when he just had velvet on them when he was much younger.

I have a fondness for deer images, since they are everywhere here and so beautiful and gentle. They are perfect Christmas imagery. 

But because I own glitter paper, I have to make my deer FABULOUS, so that's what I did today. First things first - I used the middle die of this layering stitched background set on the black panel and put that on a white card base. Then I used this pink, green and silver glitter paper with this gorgeous, Nordic style deer die. When I piece small items like the details on these dies, I like this pickup tool and liquid glue. 

The sentiment is from this die set. I love negative space dies.


Like this post? Never miss a post by following me!

This is a better photo of how sparkly it is. You can see the debossed stitching guides for the background die I used better in this photo.


includes the greeting for this card.

I used the flourish die for this card with Poppy cardstock, but I kept the negative and positive, but pieced them back together, because I like that outline it fits back into. 

Then I used this adorable folk art bird die set for a focal point. 


Have you started holiday cardmaking? I usually start after Thanksgiving, but I'm on a roll this month, so I might just keep going. 

I'm trying a new recipe tonight - so I'll let you know how it goes because it looks amazing! Hint - it's another Korean recipe.

Update - my blog freaked out and posted this early, so if you're receiving it again - I apologize - to reward you - I tried the recipe and it's AMAZING. However, it does need notes. You can see my notes here
Loveyameanitbye.


CURRENT COUPON CODES
20% off anything at Glassboard Studio  - UNDERSTANDBLUE.
10% off anything at OLO MARKER
15% off anything at Marker Universe or any of their other sites - Understandblue15.
10% off at Sweet Sentiment with code UNDERSTANDBLUE
10% off the whole store at A Colorful Life Designs - LydiaFan10
5% off at LBC here with code LYDIA5
Arkon Mounts - 20% off sitewide with code UNDERSTANDBLUE


Friday, September 9, 2022

All Die Cut Holiday Card Ideas

*Compensated affiliate links used where possible at zero cost to you. No posts are ever sponsored or paid.*

I saw a post in a Facebook group yesterday where a girl was using those plastic trays from frozen mini quiches, which are essentially muffin tins, to organize die cut pieces to mass produce die cut cards.

I thought it was brilliant. I'm not nearly that organized when die cutting, but I do love die cut only cards, and lately it seems to me that the die cutting game in general has been kicked up a notch. I see such beautiful things in Instagram and Facebook.

My fave trend is oversized word dies with inlays. Put that together with cute folk art and I'm very vulnerable to shopping! This giant, stitched and folk art themed layering Noel Die is all that and a bag of chips!!! I love it so much. The background die is new - snow and snowflakes. 


Like this post? Never miss a post by following me!

You know how I am about using the negative space from die cuts, right? No way was this one going in the recycle bin when I could pop this cute die cut nutcracker on it! I used cardstock and glitter paper to put him together - they have different hats and looks you can make with him - it's completely adorable.

This is the one I instantly thought of when I saw the quiche trays - it would be SO fun to die cut a bunch for tags and card and mix and match colors etc. Look how I gave him little blushing cheeks with my tiniest brush!


If you're not singing the song from Christmas vacation while you look at this, I don't even know who you are!

I HAD to make the wood paneled wagon like the one we had when I was little - I used this paper for the bottom. Then I took the gorgeous new script stamp and used Post it Tape to mask the top and the tire tracks before stamping and ink blending over it. The little falala die is new! This is a super quick card and you could use the masks over and over to make a bunch. 

CURRENT COUPON CODES
20% off anything at Glassboard Studio  - UNDERSTANDBLUE.
10% off anything at OLO MARKER
15% off anything at Marker Universe or any of their other sites - Understandblue15.
10% off at Sweet Sentiment with code UNDERSTANDBLUE
10% off the whole store at A Colorful Life Designs - LydiaFan10
5% off at LBC here with code LYDIA5
Arkon Mounts - 20% off sitewide with code UNDERSTANDBLUE

Hope you have an awesome weekend! Loveyameanitbye.


Thursday, September 8, 2022

VIDEO: Easy Cut Glass Effect With Spooky Potion Bottles

*Compensated affiliate links used where possible at zero cost to you. No posts are ever sponsored or paid.*

I've always wondered why we have to pick our own poison. What is that about? Don't people want to be surprised? But pick it we must! 

I have a cute little collection of bottles, some with tiny ghosts inside them that I got on Etsy, that are part of my small Halloween decor. And I have this tiny little sign that says pick your poison. 

For every little girl that dreamed of making magic potions deep in the woods with her talking crow - today's video is for you! I'm going to show you how to decorate your potion bottles, along with some fun masking tips for when you're working with die cut images.

I used this beautiful bottle set - I love that they are big enough to color, and they have a ton of fun labels in this set that you can use with them. I did use the matching dies on the labels, and I used my favorite masking paper and these colored pencils. The bottles were colored with OLO Markers and the ink glow around the bottles are neon inks.


Like this post? Never miss a post by following me!

Here's the video and there's a BIG Giveaway on YouTube if you're so inclined. 


Loveyameanitpickyourpoisonbye.


CURRENT COUPON CODES
20% off anything at Glassboard Studio  - UNDERSTANDBLUE.
10% off anything at OLO MARKER
15% off anything at Marker Universe or any of their other sites - Understandblue15.
10% off at Sweet Sentiment with code UNDERSTANDBLUE
10% off the whole store at A Colorful Life Designs - LydiaFan10
5% off at LBC here with code LYDIA5
Arkon Mounts - 20% off sitewide with code UNDERSTANDBLUE


Tuesday, September 6, 2022

VIDEO: Curtain Spotlighting Technique + Giveaway

*Compensated affiliate links used where possible at zero cost to you. No posts are ever sponsored or paid.*

How was your long weekend? Mine was uneventful other than the phenomenal wing recipe and a rare sighting of my giant stripey guard lizard (technically a Texas Spiny Lizard) in the backyard. He usually hangs out out front by my car, but he was just chilling on the back porch the other day - he's HUGE this year - but not as big as he can get - they can get up to a foot long. Tip if you want to help out your own guard lizard - take your veggie scraps and toss them near where he hangs out - which for me is a big oak tree. That will attract the bugs he likes. He's currently enjoying some celery bait I tossed out the other day. (Why don't they sell just one stalk of celery?)

Today is Hero Arts Kit Day! It's a beautiful, fall-themed kit with one of my favorite things in it - rub-ons! And the die in the kit matches those as well, which is super cool. 

I felt like coloring though, so I decided to do a spotlighting technique with a few twists - I'm calling it curtain spotlighting. I used the cling that comes in the kit and I did distressed inking on it with Granite. I used matte Duralar for the curtains, and OLO and Graphit Markers for the coloring (coupons for both below). After I put it all together with my favorite vellum adhesive, I added a few Hero Pearls dots. It just looks so elegant.


Like this post? Never miss a post by following me!

Look at this stunning kit - those colored images are the rub-ons. So beautiful. I hope rub-ons make a roaring comeback.


This was my sneak peek card from Sunday - you can see how I made that one step-by-step in my last post. So dramatic and vibrant. I love the little fruit images in the kit.


One of the add-ons is a beautiful little single stamp. I added paint to my 3x5 gel press and then used the stamp to repetitively lift paint from the image. I let that dry and then pulled it with a layer of white paint. I added a little shading with a grey colored pencil and added Hero Pearls where the dots were on the image. I used the Noel die and black glitter paper to finish. It's my humble opinion that black isn't used enough on holiday cards - so elegant!


CURRENT COUPON CODES
20% off anything at Glassboard Studio  - UNDERSTANDBLUE.
10% off anything at OLO MARKER code UNDERSTANDBLUE
15% off anything at Marker Universe or any of their other sites - Understandblue15.
10% off at Sweet Sentiment with code UNDERSTANDBLUE
10% off the whole store at A Colorful Life Designs - LydiaFan10
5% off at LBC here with code LYDIA5
Arkon Mounts - 20% off sitewide with code UNDERSTANDBLUE

Here are all the add-ons this month - I LOVE that artichoke one


So here is my video for the curtain technique - come back for the giveaway info!


We will give away a $50 gift card, drawn from the comments left across the hop. Enter by Sunday, September 11th at 11:59pm Pacific, and the winner will be announced HERE the following week.

Hero Arts

Hero Arts Creative Team


Special Guests: 


AND!! Our Hero Arts Global Team! 


Loveyameanitbye.


Sunday, September 4, 2022

Gilded Still Life

*Compensated affiliate links used where possible at zero cost to you. No posts are ever sponsored or paid.*

Howdy frandzzzz. I hope your long weekend is going well if you are in the US. I am super excited that a little break in the rain so that we could make Korean BBQ wings with - wait for it - kimchi "ranch". The ranch is so super delicious it's crazy. I'll post the recipes below - it's from a BBQ channel that we really like.

I love on holiday weekends walking out into my yard and smelling everyone's smoker going :).

So it's appropriate that today I have a food themed sneak peek for you of the new My Monthly Hero Kit!

First, let me tell you that my prior next door neighbor planted a community fig tree in his yard, and told all of us we could have figs whenever we wanted them. So when my current neighbor moved in and he told her the story she kept it that way. I love figs. 

You know who else loves figs? CATS. Cats will sit under a fig tree and eat them. And keep in mind they are obligate carnivores, if that tells you how good figs are!

They're also really beautiful, so I love seeing them as stamp images. Same with pears. So in this peek of the lovely fall themed set, that's what I chose to work with. Here's what I did.

  • I used my smallest acrylic block and put Hero Pearls all over it. 
  • Starting with the center of the card, I smooshed the block onto the Pitch Black cardstock. Lifting it gives you the dendritic effect you see in my photo
  • I stamped and die cut the fruit from the kit, and colored them with OLO Markers before gluing them down.
  • I popped that panel on a white card base.
  • I embossed the sentiment from the kit in gold. 
  • I added a few dots of pearls on the card.


Like this post? Never miss a post by following me!

OH BUT JUST WAIT until you see the rest! We are in my favorite stamping season  - fall and Halloween, and this will not disappoint you.

MY GOODNESS PLEASE MAKE THESE WINGS. Please note my spice level notes though - I like really hot food, and these are very spicy with the modifications I made, so if you like them milder use a milder gochujang and a milder buffalo sauce. It's absolutely magical. Holy cow.

Because of Labor Day, my next post with the kit will be Tuesday not Monday. Enjoy your time off.

Loveyameanitbye.


CURRENT COUPON CODES
20% off anything at Glassboard Studio  - UNDERSTANDBLUE.
10% off anything at OLO MARKER
15% off anything at Marker Universe or any of their other sites - Understandblue15.
10% off at Sweet Sentiment with code UNDERSTANDBLUE
10% off the whole store at A Colorful Life Designs - LydiaFan10
5% off at LBC here with code LYDIA5
Arkon Mounts - 20% off sitewide with code UNDERSTANDBLUE


Friday, September 2, 2022

I'm Here for it - Spooky Season!

*Compensated affiliate links used where possible at zero cost to you. No posts are ever sponsored or paid.*

September 1st is actually like a MONTH into when I think we should start celebrating Halloween, honestly. WE ARE LATE! I'd also like Halloween to extend all the way up to December 23rd - I said what I said! It's too short!

Tonight I'm doing all the Halloween things. I've tried for three years to befriend a crow and I'm clearly doing something wrong. So instead, I'm making a crow card!! I used the new detailed Halloween dies (sadly the detail on the moon doesn't show in my photo, but it has embossed details like the crow), and on the crow, I lightly rubbed it with white paint after die cutting to get a moon glow. The cute as heck sentiment and die are from the spiderweb set - I love how BIG they are. The background is a brayer cleaning sheet from a Gel Press session.


Like this post? Never miss a post by following me!

I used a similar process on the amazing layering detailed dies - I die cut them from black cardstock and rubbed white paint on them. The skull is popped up with foam so it's dimensional. This has such an Edgar Allen Poe feel. The background uses the cover die that's part of this release and I brayered my fave neon green paint over it, and lightly rubbed on white paint here and there for a distressed look. Does this not look like a creepy parlor??


Alright - FINE - I made ONE non-Halloween card with the new fall goodness. These are also detailed botanical dies with embossed detail. I watercolored them and then splattered them with gloss sprays and added Hero Pearls in gold. The background is the new sort of Moroccan style cover plate die, cut with this fabby pink glitter paper (this glitter paper is EXACTLY the color of my fave Dior lipgloss) over a panel cut with the Waves cover plate.

CURRENT COUPON CODES

20% off anything at Glassboard Studio  - UNDERSTANDBLUE.
10% off anything at OLO MARKER
15% off anything at Marker Universe or any of their other sites - Understandblue15.
10% off at Sweet Sentiment with code UNDERSTANDBLUE
10% off the whole store at A Colorful Life Designs - LydiaFan10
5% off at LBC here with code LYDIA5
Arkon Mounts - 20% off sitewide with code UNDERSTANDBLUE


BOO.

I hope you have an awesome holiday weekend - be safe!

Loveyameanitbye.


Peeking Smiley Twofer Card

*Compensated affiliate links used where possible at zero cost to you. No posts are ever sponsored or paid.*

Remember that piece I die cut from this card? It's baaaacccckkkkkkk! SO cute just the little smiley peek, right? No way was that adorable peek not going onto a card. 


Like this post? Never miss a post by following me!

I have an EXCLUSIVE Stamptember deal for you if you are shopping today! This adorable little set is free with purchase! AND I'll be back with the the latest collaboration exclusive this evening so don't miss that - this exclusive is good through the 4th so you'll be able to get it with your collab set. :)

You can click either graphic to see all the new goodies. And head over to the blog party on the Simon site for more inspiration!


Loveyameanitbye.


CURRENT COUPON CODES
20% off anything at Glassboard Studio  - UNDERSTANDBLUE.
10% off anything at OLO MARKER
15% off anything at Marker Universe or any of their other sites - Understandblue15.
10% off at Sweet Sentiment with code UNDERSTANDBLUE
10% off the whole store at A Colorful Life Designs - LydiaFan10
5% off at LBC here with code LYDIA5
Arkon Mounts - 20% off sitewide with code UNDERSTANDBLUE


Related Posts Plugin for WordPress, Blogger...