I feel like I've waited FOREVER to do this blog post. It all started back in January at CHA. (Yes, I'm still refusing to call it by the new name. Old habits die hard.)
I've gotten to know the nice people at Chameleon over many years through my work at Splitcoast - and I just love them. They are kind, creative people, always working hard on the next big thing. They were a "must visit" on my break time at the show because I had heard about their new pencils and was dying to try them. I'm a sucker for colored pencils.
Back in the olden days, we used to call them MAP PENCILS because apparently we didn't have color printers and had to color our own maps or something.
Whenever we got a chance to use them in school, I was thrilled. Crayons just didn't cut the mustard for me. Too fat and soft and imprecise. Sort of like politicians - but I digress.
I would actually say that colored pencils were the earliest indication in my life of my looming "full set syndrome," because I just HAD TO HAVE all the colors.
In school, before I knew about artist-grade pencils, we bought them at the grocery store in little boxes of 12. So demeaning now to think of suffering through grocery store pencils!
My suffering has long since ended, and I'm now a pencil fiend, which leads me back to CHA.
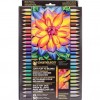
So, like their Chameleonmarkers - which offer a "one pen blend" - letting you get gradations of color with a single marker, or a single marker + a different colored topper (genius), their Color Tone pencils offer one pencil blending - as each pencil is dual-ended with naturally blending colors in pairs on a single pencil. Very cool.
Even COOLER is how silkily and smoothly they go onto the paper. I played with them at the booth for a few minutes, and was in love. And also broken-hearted because I couldn't buy them yet. That's the blessing and curse of CHA.
But fast forward to May, and our Product Focus on these amazing pencils at Splitcoast today, and you can color me happy! :)
So I tested them on two of my go-to papers for pencils - Crumb Cake cardstock and Canson Bristol Vellum. They lay down smoother color than my Prismacolor pencils, and the flipping to blend out the colors was incredibly convenient. They have a huge hit on their hands, in my book.
First - I colored a die cut on the Bristol Vellum.This is the new Happy Birthday thinlit from the new Stampin' Up! catalog. I cut a second one from glimmer paper and then adhered just the "birthday" portion to the bottom of the colored die cut, and added some glimmery stars. The background is the Diagonal Stripe Background Stamp and the card base is Bermuda Bay. Each transition between color is blending the two colors on a single pencil together.
For my second test, I used Crumb Cake cardstock - I've always loved colored pencils on other-than-white surfaces.
For this one, I wanted a warmer look, so I colored the pot from the Crafting Forever stamp set as if it were terracotta - and these pencils have a PERFECT warm terracotta blend - you'll see the pencil in the video and how easy it is to use just one pencil to get a lot of color. Since I was coloring on kraft, of course I put down a layer of white first. Then I used cool grey monotones for the brushes, just so it was the pot that pops. I kept the rest simple.
So I did a quick video on these two cards for you - from the moment I opened the box for these babies to both of my first tests. I truly, truly love them, and I think you will too.
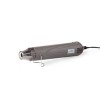
It's heavy - it will not tip over. It has a lithium rechargable battery and a teeny charging dock. When you first start it and the glue starts melting, a little glue will come out. After that - NO DRIPPING! Amazing! And it's so sturdy and weighted properly for just sitting next you you ready to go to work. I wish everything was cordless! Cords are the bane of my existence. This is the first time I've ever used a glue gun without burning myself or cussing. WINNING!
And now, since it's been a while since I've shared a recipe, I thought I'd share one today. I get a delivery from a local farm once a week, and even though I get the smallest box they offer, it's still a lot of veggies, so I blanch and freeze some things that I know I'll be missing in the two days of winter we have, and then I make other things into favorite side dishes and freeze some of those too.
I used to work near a Blackeyed Pea restaurant that a coworker and I would eat at several times a week. It's a southern food chain, and sadly, they are all closed here now. I'm NOT a chain food fan at all, with rare exceptions - but back in a nameless decade, this restaurant had REAL food, really cooked there - not microwaved frozen or canned stuff like most places serve now. I used to get the vegetarian plate quite a bit, which just let you choose three or five veggie sides. My absolute favorite one was their squash casserole. It was magical. Even people who thought they didn't like yellow squash loved this stuff. They had these amazing wheat rolls they served with every meal, and those rolls went into the casserole and therein laid the magic. So for many years since the nameless decade I've tried various recipes, trying to create this dish, and had many failures until my last farm delivery of yellow squash. I took some old recipes that I'd tried and didn't like, and tweaked them and little tears of joy priced my eyes as I took my first bite of this delightful summer squash comfort dish. I hope you enjoy it.
Copycat Blackeyed Pea Squash Casserole
What's in it
- 5-6 yellow squash, cut into slices
- 1 sweet onion, sliced or diced
- 6 King’s Hawaiian Sweet Wheat Rolls, torn into pieces
- 2 large eggs
- 1 stick butter
- 1/4 cup sugar
- 1 teaspoon salt
- 1/2 teaspoon freshly ground black pepper
How to make it
- Drop squash and onion into a large saucepan with enough boiling water to cover and a little salt. Return to boil, reduce heat and cook until tender. Drain in colander and lightly mash, allowing some slices to remain.
- Add beaten eggs, rolls, butter, sugar salt, and pepper. Mix well.
- Pour into a 3-quart casserole that has been lightly buttered
- Bake 30-35 minutes at 350 or until brown and bubbly like me. :)
If you like that abomination of a squash known as zucchini - one, it will be hard to sustain our relationship - but two - this might work with that, although be far inferior. I know that squash can be so prolific, so this is a great, fun way to use it in a recipe. While you take your zucchini and throw it on the compost pile where it belongs. :)
Head over to see the full team's review of the Chameleon Color Tones Pencils in today's Product Focus at Splitcoast, and then have some squash casserole and a nap while you're waiting for them to be shipped to you.
Loveyameanitbye.


